How Do I Format the Checkstub on my Paychecks?
Background
When you set up printed paychecks in Patriot Software, you will select what employee information, like the employee address, on the checks and which layout you use.
You can further customize the placement of the checkstub (the details of the paycheck). By default, your check stub template will appear at the very top of the page if you choose “Check on Bottom,” and will appear at the top of the middle third of the page if you choose “Check on Top.” If needed, you can adjust the placement of the top of your check stub, and also add a line break, in order to accommodate any perforations or pre-printed items on your payroll stubs.
How to Format the Checkstub on Paychecks
- Settings > Payroll Settings > Paycheck Printing Options
- Select your printing method, either “Check on Top” or “Check on Bottom.”
- By default, the employee’s Social Security number will not appear on the check stub. However, you can check the “Display Last 4 Digits of Employee SSN on Check Stub” box. The last four digits of the employee’s Social Security number will appear below the employee’s name and address on the check stub. There is not an option to show the employee’s full SSN in accordance with some state laws.
- If your business name is different than your tax filing name, choose which name you would like to appear on the paycheck stub template.
- If you use magnetic printer toner and blank checkstock, click “I need to print my bank account information on blank check stock.” For more details, see How to Print Paychecks Using Blank Check Stock.
- Click “Layout Adjustments” to show the pay stub template options. This is also where you will indicate you want to add additional information such as employee address, or your company name by clicking the checkboxes.
- To move the entire check stub down, enter a positive number of rows. For example, to move the check stub 5 rows down the page, enter “5.”
- To add a line break in the middle of the check stub, you can keep the “Line Break Starts at Row” number at 0 to insert the line break at the top the middle third of the page (if you use Check on Bottom) or the top of the bottom third of the page (if you use Check on Top). You can also enter a negative number to insert the line break higher, or enter a positive to insert the line break lower.
- Next, enter the number of blank rows to insert between the two sections of the check stub. For example, if you use Check on Bottom, and keep “Line Break Starts at Row” at 0, and “Number of Blank Rows” is 5, your check stub will look like this:
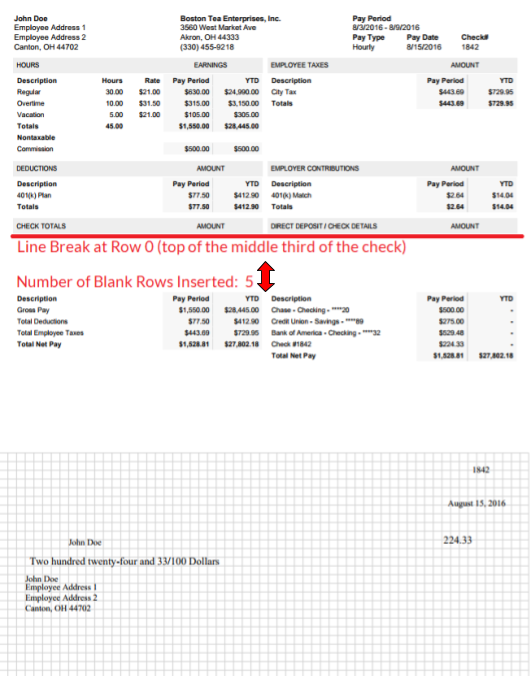
You can experiment with the Line Break and Blank Row numbers, and click “Print Sample” to see how your check will look. You can print as many sample checks as needed to adjust the line break until it prints correctly. You do not need to click Save in order to print a sample paycheck, but you will need to save your settings once you are satisfied with the placement.